Thursday, March 31, 2011

PB&J doesn't need bread

I'm getting lazy about posting.  I need to change my methodology and just post one thing at a time and save it for my "best" work, but not yet.  Because I think everything I make is the best, obviously, at least as far as baked goods are concerned.

First up...sweet treats!  Oatmeal Cookies!  Rarely do I want a cookie that doesn't include chocolate.  Or peanut butter.  Or both.  There are exceptions.  Molasses and/or Ginger cookies, those amazing frosted Lofthouse Sugar Cookies (or sugar cookies in general), the yummy pumpkin caramel cookies I make in the fall, and maybe a few of my mom's Christmas cookies.  Ok so that's a lot of exceptions but I can eat a lot of cookies.  Anyway, someone at work had a bag of Trader Joe's 100 calorie oatmeal cookies and I decided I needed to make oatmeal cookies!  I also randomly had some raisins last week and they tasted really good so I figured I needed to put them in a cookie.  I didn't change a thing about the recipe; it was perfect as is.  They were super soft and chewy and tasted amazing, despite having no chocolate.  I recommend baking & eating these immediately.


Then I had to make a treat to bring to my Cooking Matters volunteer class - where we teach the teens of El Monte, CA, how to cook healthful, affordable meals.  This week was graduation and we needed a treat to go with all of the awesome food the kids made (that could be another entire post that I am going to forgo.)  Anyway, kids pretty much love PB&J so I made these yummy bars, no bread needed.  Just 3 cups of peanut butter.  Super rich and delicious - although probably not so healthy.  I used raspberry jam (not seedless) from Trader Joe's but any flavor would work, it just wouldn't be as good.  I just happen to think there is no flavor of jam superior to raspberry.


In other new adventures, I made granola!  But not just any granola...Paleo granola.  That means no grains (or dairy or other things that don't go into granola anyway).  I had a taste of Steve's Original Paleo Krunch when I was in Michigan a few weeks ago and it was DELICIOUS!  While I zero intentions of going Paleo, this knock-off recipe is pretty good!  I found all of the ingredients except the unsweetened coconut at Trader Joe's.  I did find that the granola burned really easily so I would recommend doing a lower temp and stirring more often.  And since I refuse to go Paleo, I ate this granola on top of my berries and Greek Yogurt for breakfast.  Mmm.  I also may or may not have snacked excessively on it...


And finally, some cooking.  Some no recipe, figure it out as I go, easy pasta dishes.

For Sunday dinner & a few lunches this week, I wanted to do something to use up a bag of frozen artichokes.  I didn't measure a thing but it was something along these lines:

Chicken breast, cut in strips, salt & peppered, and browned
Bacon, cut into little pieces before cooking
Pasta (I didn't make it, sorry to disappoint)
Frozen artichokes
Chopped onion
Lemon juice
Capers
Parmesan Cheese
Romano Cheese

Cook pasta.  Cook bacon & remove from pan. Brown chicken in bacon grease.  Remove chicken from pan and add onions & artichokes.  Saute until warmed.  Add cooked chicken and pasta.  Sprinkle with lemon juice.  Add capers.  Grate cheese on top. Enjoy! Not bad at all!


And last but not least, a super easy but super tasty dinner for tonight.  It required zero skill and zero effort but tasted pretty awesome.  I just made one serving and this might be a new weeknight stand by (which right now is usually veggie burgers & steamed broccoli).

Cook pasta
Saute shrimp & remove from pan (it gave off some water because it was slight frozen so I rinsed out the pan before adding the sauce)
Add a spoonful of jarred Chimichurri sauce to pan, add back shrimp & pasta
Add a splash of lemon juice

I bought the Chimichurri from this super cute lady at Penman Springs Vineyard up in Paso Robles.  I really would like to make my own at some point for until I use my jar, I'll hold off.  Its so herby and delicious and was a nice simple dinner.  Little baby shrimp are so cute!!


Ok, phew, all caught up.  I have no idea what I'm making next.  I had a suggestion to make spaghetti squash and wanted to do that last week but Ralph's was fresh out.  I found a few recipes I want to combine so when I get a chance, I will definitely do that.  For baked goods, I'm thinking either something with ricotta (or else it might become gnocchi), Nutella, or Almond Butter.  But in the mean time, I have guests coming to town so I will likely be eating out instead of cooking, so maybe I'll get some inspiration for my next challenge!

Tuesday, March 29, 2011

Cupcakes with Pearls


Last week work asked me to pick up cookies during lunch to take to a meeting, this week they put me in charge of desserts for the department social. Life is good.

My original task was to grill some desserts. I found a bunch of recipes, but was lacking time and energy, so I defaulted to cupcakes. Don't you default to homemade cupcakes when you are running low on time and sleep? I love vanilla beans, so I added vanilla bean seeds to a basic white cupcake batter. For the frosting, you need the best, so I chose a Swiss meringue buttercream adapted from Ina Garden. Ina knows her stuff, but man does every baking recipe of hers make a lot. I reduced the recipe by one third. Needless to say, that extra third could easily have been consumed by Christine. I on the other hand need a sleeping pill after all that sugar.

The recipe makes 3 dozen cupcakes, and can easily be reduced, but why would you want to? I hope this is enough for work tomorrow.

Lined up and awaiting their pearls.


Another up close and personal shot of these cuties.


Vanilla Bean Cupcakes
adapted from Curious Cupcakes

6 large egg whites*
1 1/2 cup milk**
1 tablespoon vanilla
4 1/2 cups sifted cake flour
2 1/4 cups sugar
1 vanilla bean, split and seeded
2 tablespoons baking powder
1 1/2 teaspoon salt
18 tablespoons unsalted butter, softened


Preheat oven to 350F


Fill one 12-hole cupcake tray with cupcake liners, but you will need three total.

In a medium bowl, combine egg whites, vanilla and 1/2 cup milk.

In a large mixing bowl, combine cake flour, sugar, vanilla bean seeds, baking powder and salt and mix together to blend. Add the butter and remaining 1 cup of milk. Mix on low speed until dry ingredients are moistened. Increase to medium speed for 1.5 minutes. It will look like decadent ribbons of paper white lava being beaten around in the bowl at this point. Then add the egg, vanilla and milk mixture in three equal parts, beating for 20 seconds between additions.

Pour the batter into prepared cupcake tray with an ice cream scoop or pastry bag. Each cupcake wrapper will be about 2/3-3/4 full. Place trays in the oven for 15-20 minutes, remove when golden yellow and a toothpick inserted in the center comes out clean. Let cool completely before frosting.


Chocolate Buttercream
Adapted from Ina Garten

10 ounces bittersweet chocolate
8 ounces semisweet chocolate
1/2 cup egg whites, at room temperature*
1 cups granulated sugar
1/8 teaspoon cream of tartar
1/2 teaspoon salt
1 pound unsalted butter, at room temperature
1 tablespoon vanilla
1/2 teaspoon instant espresso powder, dissolved in 1/2 teaspoons water

Melt chocolate in a heat-proof bowl set over a pan simmering water. Set aside until cooled to room temperature.

Mix the egg whites, sugar, tartar, and salt in the bowl of an electric mixer fitted with the whisk attachment. Place the bowl of egg whites over the pan of simmering water and heat the egg whites until they are warm to the touch, about 5 minutes. No need for a thermometer, just make sure sugar is dissolved and not grainy. Return the bowl to the mixer and whisk on high speed for 5 minutes, or until the meringue is cool and holds a stiff peak.

Add the butter, 1 tablespoon at a time, while beating on medium speed. Scrape down the bowl, add the melted chocolate, vanilla, and espresso, and mix for 1 minute or until the chocolate is completely blended in.


Chef notes:

*I intend to make
7 yoke pasta with the egg yokes left over from this recipe. You can also use them for any custard, like creme anglaise or creme brulee.

**I rarely have milk on hand, so I've been experimenting with those shelf stable milk boxes and dehydrated milk. Both produce fabulous results.


Do you dislike me for posting this? or for reducing Ina's buttercream recipe by one third?

Sunday, March 20, 2011

I want to buy a new kitchen gadget, but before I do, I need to pump out a lot of recipes I've been collecting for a few years now. First up was Pasta Carbonara. Sooo good! Don't know why I've never had it before. Ate it all before I could take pictures. Vanilla Bean Biscotti's also came out of the kitchen, but are stowed away in the freezer for a rainy day, oh wati!


Elvis cupcakes anyone? The smallest batch of cupcakes I've ever made.


Egg souffle. Sooo good! Whipped egg whites, with a yoke, cream, and cheddar cheese smack in the middle. Then toasted, served with toast. Will definitely have to make again for Christine when she's home.


Orange chicken. With perfected brown rice.


Monday night dinner.

Wednesday, March 16, 2011

Irish Cupcakes

I had some pretty grandiose plans for St. Paddy's Day feasts I wanted to create....corned beef & cabbage, like my mom used to make every year, Irish soda bread, Reuben sandwiches (are those even Irish?  It's the corned beef I associate with Irish even though it's not really even Irish), and obviously some baked goodies.  But alas, time got away from me and here it is the eve of St. Paddy's.  I've been working at least 12 hour days, training for my half marathons, volunteering, socializing, taking cooking classes, etc.  Notice sleeping isn't on that list.  Haven't been doing that.  But anyway, at the very least, I had to bake something for one of my favorite holidays of the year!  I found lots of tasty sounding "Irish" sweets, but my favorite was this amazing booze-infused cupcake that I just had to have.  I made them as mini cupcakes...this picture doesn't even do justice for the deliciousness.  But I have about a zillion of them so if you see this & live close to me, you might be lucky enough to have one.


The recipe was easy.  They made the house smell good.  And they're delicious.  And best of all, I have left over Bailey's.  It will take every ounce of self control in my body not to put that in my coffee tomorrow morning....

Sunday, March 13, 2011

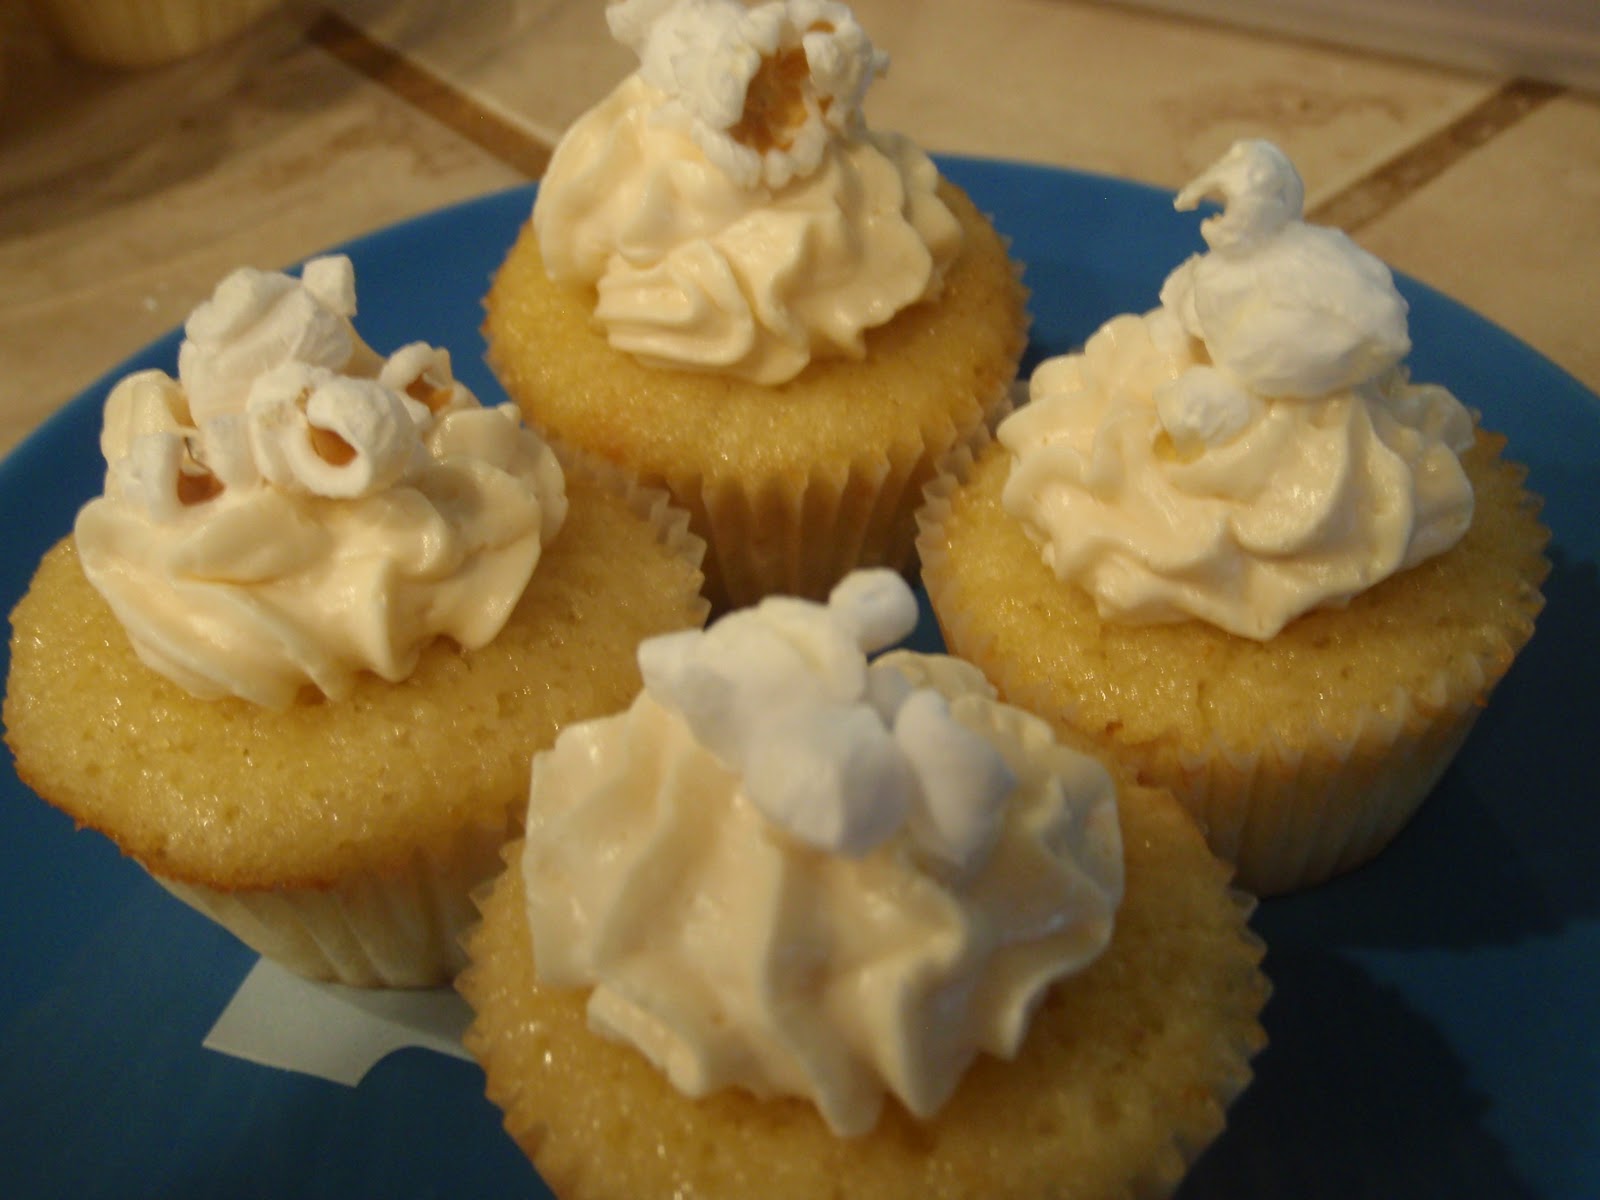
The cupcake that nearly killed me.

I've been on a popcorn kick lately.  I tend to forget about Grandma's old air popper and every now and then, I rediscover it and eat popcorn like it's going to be extinct (or whatever appropriate word would apply to the End of Popcorn).  This time I rediscovered my air popper when I moved, which was about two months ago.  It took a little while to use it...had to find a spot in the kitchen, buy popcorn, and have the right popcorn moment.  Mmm, buttery, salty popcorn.  Mounds of it.

So when I stumbled upon a recipe that combined two things I love so much, popcorn and cupcakes, I had to make it!  Seriously?  Butter Popcorn Cupcakes?!  Unheard of, right?

When I reviewed the recipe, I noticed some interesting things.  Like, popcorn flour.  Uh...what is that?  I tried to see if it was something I could buy but no luck.  Turns out you can make it....pop some popcorn, put it in your newly acquired spice grinder, and grind away until you've made a huge mess of powdery popcorn in your kitchen.  And yes.  I bought a spice grinder just for this recipe but I've been meaning to buy one anyway.  By spice grinder, I mean coffee bean grinder (same thing).  I should have actually gotten two, one for coffee AND one for spices, but we'll see how much I use the one I have...it's more about not mixing weird flavors.  Here's everything that went into making the popcorn flour:


Anyway, I digress. The recipe also called for pureed creamed corn.  Hurl!  Gross!  That stuff is DISGUSTING!  VOMIT IN A CAN!  UGH.  But I used it.  And the fun part of the recipe - making buttery popcorn and soaking it in warm milk.  It called for a 1/4 cup of the popcorn in the milk but I doubted that would give me enough popcorn flavor so I loaded that cup of milk up with as much popcorn as it would hold.  It soaked it up like a sponge...duh.

Then came failure.  I handle failure in the kitchen about as well as I handle being kicked in the teeth.  The caramel.  I suck at caramel.  I nearly ruined it when I made the chocolate salted caramel cookies about a month ago and it did not exactly made me want to start producing caramel on a regular basis.  Rebecca has it perfected (I found the caramel she left for me, per her previous post, and it was delicious).  This recipe was a bit different than the last caramel I made, so there was hope.  What could possibly go wrong with a pan full of sugar??


Turns out a lot can go wrong.  I did the first batch and when I added the cream, suddenly I had a rock hard blob of molten sugar, which when stirred, caused a searing splash of milky sugar on my arm.  FAIL.  This is not cool.  I want a freaking cupcake and even though I have no intention of making the buttercream portion of the frosting until the morning, I WANT A CUPCAKE WITH CARAMEL.  NOW!  And I deserve it after that failure! So I eat one with one of Rebecca's caramels.  Holy crap! This is good!  Now I DO want to finish the entire process.   Even the buttercream!  I want that entire cupcake in my mouth by the end of the night!   They're mini cupcakes so eating one more would still really only be like eating half of a full cupcake, by the way.

Caramel Take 2.  Slow, low, melting sugar...all looks good.  The cream is ready and waiting.  I've stretched out my right arm so that I can stir and pour simultaneously without causing seizing, splashing, or any other horrible side effect.  Then I notice what looks like pepper in the nearly ready sugar.  What the crap!? Is my bargain Teflon pan from 5.5 years ago leaving little bits of carcinogens in my caramel?! I might be tired but I sure as sh*t didn't put pepper in the sugar.  Yet another FAIL.  At least this time I haven't sacrificed more cream...but my motivation and confidence have gone down the garbage disposal, along with both failed batches of caramel.  Will have to try again in the morn.

So after a refreshing 10 hours of much needed sleep, I go for Take 3.  Third time's a charm, right? <Insert Wrong Answer Buzz here>.  Oh no.  I got out my fancy cookware, compliment of my brother, the pot salesman who also has a love of cooking.  Third cup of sugar goes into the nice pan.  Low heat, I walk away for a few minutes, thinking I've got some time.  Within about 47 seconds (ok, maybe longer), I have smoke rolling off my stove.  WTH?!  Down the drain it goes....FAIL....AGAIN.

Fourth try?  This is getting to be worse than dating.  I would never go for a 4th date if 1, 2 and 3 were this bad.  But here we go again, I kinda wanna be more than friends...with the caramel.  Yea, a little Neon Trees plug there.  That's for you, Cara.  Neon Trees still sings it.  Anyway...4th cup of sugar.  Low heat.  This time I notice the sugar is melting on one side of the pan before the other, so I rotate the pan, but don't stir yet.   Keep rotating.  This is killing me, I am NOT this patient and am really bitter about the 3 failures.  Sugar looks goooooood.  I am feeling like this is my time and there will be caramel success.  Cream is added.  Hard blobs of sugar form again....OMG.  Back on the stove, which was NOT in the recipe, but it seemed to help a little bit.  Meanwhile, in the background, I hear someone on Food Network talking about caramel and how they start it with sugar AND water.  Is THIS the problem??  Bad recipe?  Whatever, I'm DONE with this.  The buttercream frosting only needs 2-3 TBSP of the caramel so I at least have enough without lumps that I can use for the frosting.  But I think the final tally was Christine: 1, Caramel: 3....I gave myself a point for the useable, but not amazing, caramel.  Actually, it tastes amazing but it just wasn't all that smooth. I can't believe I went thru all that for 3 TBPS of caramel (it made more than that)...next time I will use Smucker's and add some sea salt.


Ok, time for the buttercream.  Those of you that know me well know that I love, love, LOVE my buttercream frosting.  I can eat it by the bowlful and regularly eat the frosting off of other people's plates when they scrape off what they think is "too much".  I used about twice as much sugar as the recipe called for.  I like butter but it was a little too buttery.  I won't even talk about the frosting process.  Let's just say I wished Rebecca was here to do it for me.  She has a way with the piping bag.  But, I managed to get the stupid frosting on the stupid cupcake and end up with something really pretty AND tasty.


A lot of work...but here's the final product!  I hope my coworkers appreciate my efforts...


During the cupcake making process, I also made myself a frittata (basically a baked omelet) using up some of the ingredients I came home with after the Wednesday night class with Cooking Matters.  I had onion, zucchini, tomatoes, spinach and eggs, so frittata was an obvious option.  Chop veggies, saute, add eggs (I used 2 whites + 1 whole egg), pop in oven for a bit to firm up the eggs, add cheese, eat.  For the cheese, I had some Parmesan that I intended to grate on top, but it my laziness, I decided big shards of cheese would be better, and prettier.  Overall, it tasted decent, but it needed garlic and more salt.  I added a tiny bit of salt thinking the cheese would be salty enough, but it needed more.  It also would have been better had I grated the cheese on top instead.  But all in all, it was a tasty light dinner (where light = not all that filling but I made it intending to eat the whole thing and then I only ate half out of shear exhaustion).   But the real purpose of me posting this dinner was not about the culinary magic I created, since it was good but not amazing, but to say, LOOK MOM, I EAT THESE THINGS NOW!!!  Zucchini.  Tomato.  Onion.  All together.  On purpose.  And I liked it. :)   All those years at home I turned up my nose at the fresh veggies at my disposal and now I wish I could have it at my finger tips again...


I think I might be done in the kitchen for the weekend.  Phew.

Saturday, March 12, 2011

Sushi Lesson

On to a new adventure - making sushi!  Doesn't so much require much cooking, but it's still a culinary challenge, and also something I crave regularly.  And technically making perfect rice is a requirement so some cooking skills are necessary.  Anyway, so my friend Haley & I have been talking about taking a sushi class for quite some time - probably close to 6 months by now.  It's always been one of those things that I let the experts handle, which is similar to how I feel about steak.  Plus the amount of equipment and ingredients required for something I'm not going to make that often seems like a waste.  But I also have found myself a) spending upwards of $75 on a sushi dinner (I'm sure the number of cocktails has nothing to do with that price tag) and b) throwing dinner parties for friends.  So maybe if I do b) and make my own, it wouldn't cost a) to feed everyone?  But most importantly, I want to be good at all things food related.  Selecting, preparing, eating.


So Haley found us a class at a small college around here - $29 for the 3 hour class plus $20 for supplies.  No cocktails (altho they did have a small sample drink of sake + plum wine but I didn't like it and gave it to Haley), but not much more cash than my normal sushi dinner out.


I get there and see that the class is being taught by an an old white dude.  I'm unimpressed.  I was expecting the sushi chef from RA or Tuna Town or Wabi Sabi that barely speaks English to teach me how to fillet ahi tuna AND a cucumber immediately and fill it with tempura shrimp and rolled in crunchy panko and smother it in eel sauce.  But, put my ignorance aside, and this guy wasn't bad!  And actually I liked him even better when after class we got to talking and I find out he went to college at....none other than Central Michigan!  Small world!  And obviously I was rockin' a CMU t-shirt during the class but had it hidden under a hoodie (and I'd actually almost grabbed a Central hoodie instead of the one I wore).


Anyway, it's a husband and wife team; he teaches tons of classes but has had no formal training, just a passion (kind of how I am about cooking!).  The wifey kept him organized and handed out our plates of salmon and avocado and all that jazz.  He explained where to find the ingredients and exactly what to buy - the rice, the rice vinegar, etc.  He told us to buy fresh fish that had not been frozen yet, and to freeze it for 24-48 hours, then thaw for a day, before using.  This is apparently a safety precaution and makes eating sushi less risky.  While some restaurants may take a fish out of a tank and have it on your plate 10 minutes later, he said a home sushi chef should really not do this.  Buying fish that hasn't been frozen yet is very important so that YOU can freeze it and not do the freeze/thaw/freeze/thaw thing, which is basically asking for trouble.  He then taught us the technique for spreading the rice onto the seaweed paper, for both a normal roll and inside out roll.  How much rice to use, how to spread & position it, and how to add ingredients before rolling.  He also showed us how to clean and prep shrimp to cook before using for sushi (you know, the fish on top of blobs of rice).  For the rice, we didn't actually make it ourselves, but he demonstrated the technique so hopefully I can replicate that at home.  After I buy a big fat expensive wooden sushi rice bowl.


Very basic.  But enough information that Haley & I both feel comfortable making it at home and adding our own creative touches.  You know darn well that deep fryer will come back out so I can make tempura shrimp.  This guy also does home parties so we're thinking it would be fun to get a group together and he'll give a sushi-making lesson, and also do some fancier stuff just for us to enjoy.


And the best part?  Eating our work at the end!  And despite having had sushi for dinner on Thursday night, learning to make it (and eating it) Friday night, I really want sushi tonight...and a big fat sake bomb on the side!

Sunday, March 6, 2011

Thursday Morning Breakfast

It's my turn again to bring in breakfast for work. Last time I made biscuits and gravy loaded with TLC. People went back for thirds. How to out do that this time? I would make savory cheddar and cheese rolls. Fashioned very similarly to our dear friend the cinnamon roll, these puppies were stuffed with ham and cheese instead of cinnamon and sugar. The recipe was a hodge-podge of ideas, and therefore I have re-written it below.


Up close and personal.


The dough was adapted from Pink Parsely. Sooooo good! Will have to make those cupcakes again, they were the cutest stinkin cupcakes you've ever seen. And they tasted identical to Cinnabon.

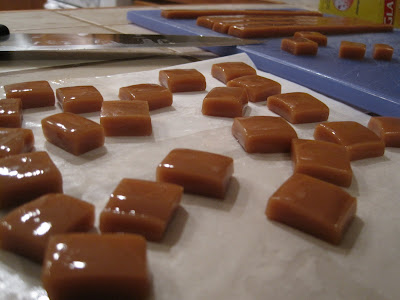
And finally, as my mother can attest, I don't stop. Thursday evening I made caramel. Sweet, salty caramel. I had heavy whipping cream left over and a house guest coming to my parents place who devours my caramel. The little beauties are a pain in the butt to wrap, but very much worth it. Caramel recipe to come. Pretty standard though, just time consuming. You can sprinkle sea salt on top of the caramel squares, but it just gets lost when you wrap them individually.
Here they are in the different stages of wrapping. I felt like Lucille Ball a bit. I don't like wrapping them alone, my attention span barely lasts, and too many of them end up in my stomach or the trash because I just can't wrap them all. Hopefully Christine will find the ones I left for her.


Aren't they so gorgeous all glossy like that?


Cheddar and Cheese Breakfast Rolls

Dough
2 1/4 tsp active dry yeast
1/4 cup sugar
1 cup warm milk (100-110 degrees F)
2 eggs, room temperature
1/3 cup butter, melted
1 tsp salt
4 1/2 cups bread flour

Filling
3 Tblsp Cream Cheese, room temperature
1 Tblsp butter, room temperature
1 cup good ham, diced
1 1/2 cup cheese1 Tblsp chives, chopped

Topping
1 cup sharp cheddar cheese
1 Tblsp chives, chopped

Dissolve the yeast and sugar in the warm milk in a large bowl and let stand for about 10 minutes until foamy.

Mix in the eggs, butter, and salt. Add flour and mix un
til well blended and the dough forms a ball. Turn out onto a lightly floured surface, and knead about 5-10 times. Place in an oiled bowl, cover and let rise in a warm place until doubled in size (about one hour). Even though I love kneading dough, I let the Kitchenaid do all of the work, it was a weeknight!

After the dough has doubled in size, turn it out onto a lightly floured surface, cover and let rest for 10 minutes. Roll out to 22"x13". Fill sheet of buttery pastry with a thin layer of cream cheese and butter. Generously sprinkle over shredded cheese and ham. I prefer to use a mixture of white melting cheeses. Anything from jack to fontina. Call me crazy, but I'm partial to processed white American cheese. It melts so well! Finish off with a dusting of chives.

This is only half the dough, from my test batch the weekend before.
The recipe above will be twice as large.


Roll pastry into a log and cut in 1 1/2 to 2 inch pieces. Try cutting the dough using unflavored dental floss. It makes such clean cuts. Arrange in a 9x13 pan, cover and let rest for an hour in a warm place.

The dental floss technique. It even cuts through the ham.

Here they are after the second rise. I never achieve
double the volume in the second rise.
When they bake, the puff up very nicely.


Bake at 325F for 30 minutes or until slightly golden. During the last 5 minutes, top with cheddar cheese and chopped chives.

I toyed with the idea of adding a very thick alfredo sauce to mimic a cinnamon roll's frosting. The sauce came out too salty, so I decided to forgo the extra fat. The rolls were plenty perfect without.

Note: This recipe is easily halved or doubled. For my coworkers, I made 1.5 batches, which filled two perfect 9x13 pans and some left over rolled ends.

Followers

Contributors